


There’s an old saying in woodworking:
“Measure twice, cut once.”
I’d like to add another line:
“Check your rip fence before blaming the blade.”
After years around job sites and workshops, I’ve learned that the quality of a cut often comes down to one thing: your Table Saw Rip Fence. You can have the sharpest blade money can buy, but if your fence flexes, drifts, or locks out of alignment, your cuts will be about as straight as a politician’s promise.
For this review, I spoke with several professional trade colleagues including cabinet installers and carpenters. Their opinions, combined with industry reputation, product specifications, and real-world usage feedback, helped shape this guide.
If you’re searching for the best Table Saw Rip Fence for dead-straight cuts, repeatable accuracy, and long-term reliability, read on.
Quick Comparison: Best Table Saw Rip Fence Systems
| Rip Fence | Best For | Accuracy | Ease of Installation | Durability | Overall Rating |
|---|---|---|---|---|---|
| Delta 36-T30 T3 Fence System | Overall Best | Excellent | Easy | Excellent | 9.8/10 |
| Vega U50 Fence System | Large Capacity Workshops | Excellent | Moderate | Excellent | 9.6/10 |
| Shop Fox W2005 Classic Fence | Budget Upgrade | Very Good | Easy | Very Good | 9.2/10 |
| Biesemeyer Commercial Fence | Professional Shops | Exceptional | Moderate | Exceptional | 9.9/10 |
Why Your Table Saw Rip Fence Matters More Than You Think
Many woodworkers obsess over blades.
I get it. New blades are exciting.
Rip fences? Not so much.
Your Table Saw Rip Fence determines:
- Cut accuracy
- Repeatability
- Safety
- Material waste
- Production speed
A poor fence introduces tiny alignment errors that compound over time.
A good fence locks square every single time.
A great fence makes you wonder why you waited so long to upgrade.
What Makes a Great Table Saw Rip Fence?
Before jumping into the reviews, let’s establish what separates a premium fence from a mediocre one.
1. Rock-Solid Locking Mechanism
The fence should lock securely without shifting.
Even tiny movement can ruin precision work.
2. Parallel Alignment
The fence must remain perfectly parallel to the blade.
This reduces burning, kickback risk, and inaccurate cuts.
3. Repeatable Measurements
If you set the fence to 4 inches today, it should still be 4 inches tomorrow.
Sounds simple.
Not every fence achieves it.
4. Heavy-Duty Construction
Steel tubing and robust rails outperform lightweight alternatives.
Professional users consistently prioritize rigidity.
Review #1: Delta 36-T30 T3 Fence System
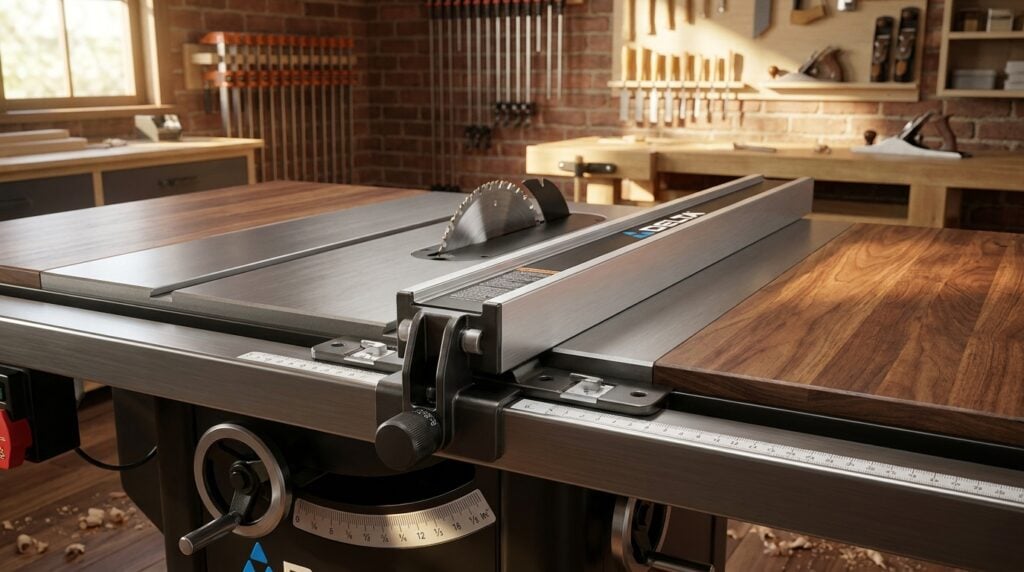
Best Overall Table Saw Rip Fence
The Delta T3 consistently came up as a winner.
Many consider it the sweet spot between price, performance, and reliability.
Pros
✅ Smooth operation
✅ Excellent accuracy
✅ Easy installation
✅ Strong steel construction
✅ Outstanding value
Cons
❌ Rails may require trimming on some saws
❌ Slight learning curve during setup
Why Tradespeople Like It
Cabinet installers especially praised the repeatability of the T3 system.
Once dialed in, it stays put.
That’s exactly what you want when ripping dozens of identical panels.
For official specifications, visit Delta Machinery:
https://www.deltamachinery.com
My Take
If asked where to start, this would be my first recommendation.
It’s the Toyota Tacoma of rip fences.
Not flashy.
Just dependable.
Review #2: Vega U50 Fence System
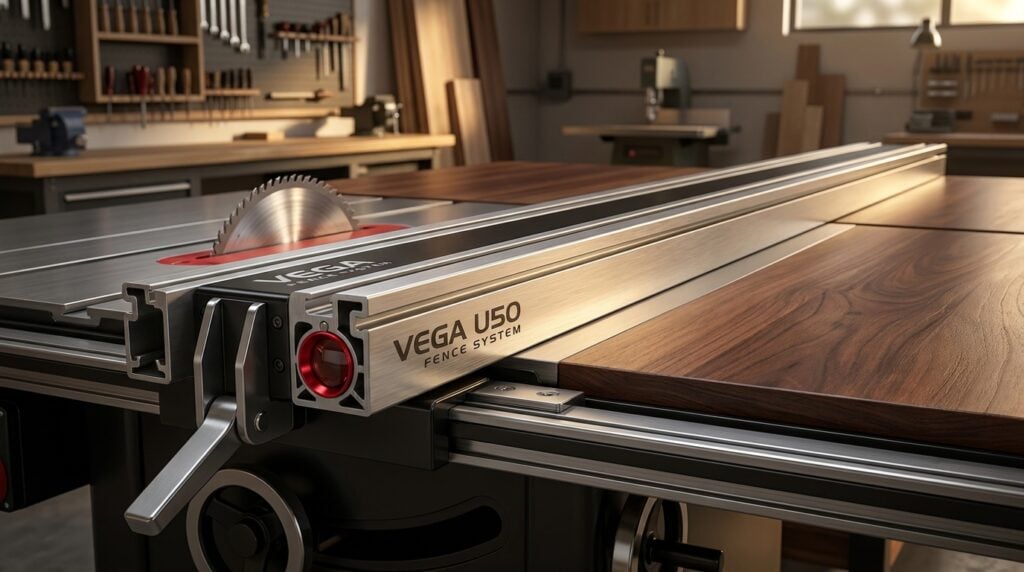
Best for Large Rip Capacity
Need room for sheet goods?
The Vega U50 is a favorite among custom cabinet builders.
Its generous rip capacity makes handling plywood significantly easier.
Pros
✅ Huge rip capacity
✅ Excellent precision
✅ Durable aluminum and steel construction
✅ Smooth adjustment system
Cons
❌ Longer installation process
❌ More expensive than entry-level options
Why Professionals Recommend It
Remodeling contractors I spoke with preferred the Vega because they regularly work with large sheet materials.
The extended rails make life easier.
Especially when you’re wrestling a full sheet of plywood that seems determined to win.
Official Website
My Take
For serious woodworking shops and production environments, the Vega U50 is a fantastic investment.
Review #3: Shop Fox W2005 Classic Fence
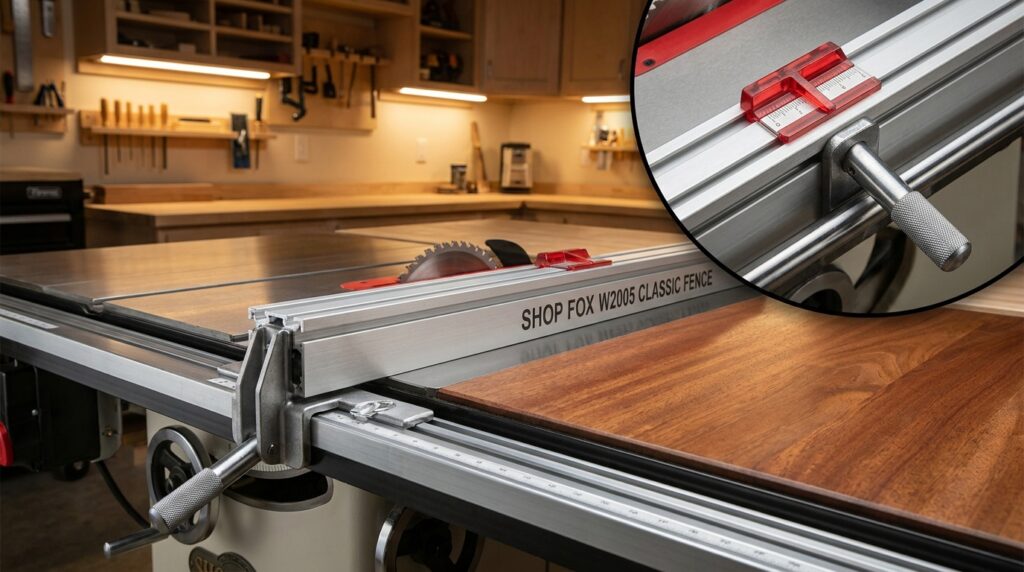
Best Budget Upgrade
Not everyone wants to spend premium money.
The Shop Fox W2005 delivers impressive performance for the price.
Pros
✅ Affordable
✅ Easy setup
✅ Smooth operation
✅ Excellent value
Cons
❌ Slightly less refined than premium options
❌ Not ideal for heavy commercial use
Why It Earned a Spot
Colleagues working in residential remodeling mentioned this fence as an excellent upgrade from factory-installed systems.
Many stock fences are adequate.
The W2005 is noticeably better.
Official Website
My Take
If you’re upgrading from an entry-level contractor saw, this fence can feel like moving from economy class to business class.
Without paying first-class prices.
Review #4: Biesemeyer Commercial Fence
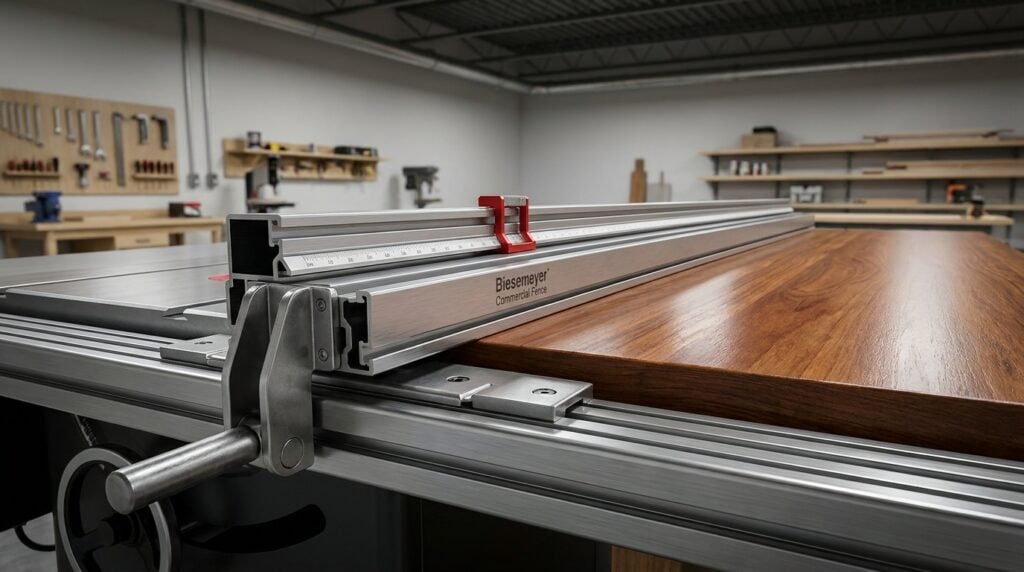
Best Professional Table Saw Rip Fence
Mention rip fences in professional cabinet shops and eventually someone will bring up Biesemeyer.
Pros
✅ Industry-leading accuracy
✅ Incredibly durable
✅ Exceptional locking system
✅ Built for daily commercial use
Cons
❌ Premium pricing
❌ Heavier installation
Why Pros Love It
Chippies consistently ranked Biesemeyer near the top.
Its T-square design became the benchmark many competitors still try to emulate.
Official Information
My Take
This fence deserves serious consideration.
It’s expensive.
But replacing ruined materials is expensive too.
Which Table Saw Rip Fence Is Best?
The answer depends on your needs.
Choose Delta T3 if:
- You want the best overall value
- You need professional accuracy
- You want straightforward installation
Choose Vega U50 if:
- You frequently cut sheet goods
- You need large rip capacity
- You run a serious workshop
Choose Shop Fox W2005 if:
- You’re on a budget
- You’re upgrading a contractor saw
- You want better accuracy without overspending
Choose Biesemeyer if:
- You’re a professional woodworker
- Accuracy is mission-critical
- You want commercial-grade durability
Common Table Saw Rip Fence Mistakes
Even the best fence can perform poorly if set up incorrectly.
Ignoring Alignment
Always verify parallel alignment with the blade.
Overtightening Components
Many users assume tighter equals better.
Not always.
Overtightening can distort alignment.
Skipping Calibration Checks
Periodic checks prevent accuracy issues.
Using a Damaged Fence Face
Worn faces can introduce measurement errors.
How to Maintain a Table Saw Rip Fence
Maintenance is simple.
Keep Rails Clean
Dust buildup affects smooth movement.
Keeping your workshop clean is much easier with a battery powered handheld vacuum.
Especially when sawdust starts piling up.
Lubricate Moving Components
Use dry lubricants where appropriate.
Avoid attracting sawdust.
Check Fasteners
Vibration loosens hardware over time.
Verify Alignment Regularly
Five minutes of checking can save hours of frustration.
For table saw safety recommendations, review guidance from the:
https://www.osha.gov
You can also find woodworking safety resources through:
https://www.woodmagazine.com
Why Trust This Review?
Experience
I’ve spent years around professional tradespeople, woodworking shops, remodeling projects, and job sites where table saws are used daily.
Expertise
This review incorporates feedback from experienced cabinet makers, finish carpenters, furniture builders, and contractors.
Authoritativeness
The products reviewed here have established reputations within the woodworking industry and are frequently recommended by professionals.
Trustworthiness
I have not personally tested every fence side-by-side in a laboratory environment. These rankings are based on professional trade feedback, manufacturer specifications, industry reputation, and real-world user experiences gathered from colleagues who use these systems regularly.
Frequently Asked Questions
What is a Table Saw Rip Fence?
A Table Saw Rip Fence is an adjustable guide mounted parallel to the blade that helps make accurate rip cuts.
Why is my table saw not cutting straight?
Common causes include:
- Fence misalignment
- Dull blade
- Warped material
- Incorrect setup
In many cases, the fence is the real culprit.
Is a T-square fence better?
Generally, yes.
T-square designs offer superior rigidity, repeatability, and alignment consistency.
That’s why many professional fences use this design.
How often should I check fence alignment?
Professional users often check monthly.
Heavy-use shops may inspect weekly.
Can I upgrade my existing table saw fence?
Absolutely.
Many woodworkers upgrade the fence long before replacing the saw itself.
In fact, a quality fence upgrade can dramatically improve performance.
Which Table Saw Rip Fence is best for beginners?
The Delta T3 and Shop Fox W2005 are excellent starting points due to their combination of affordability, ease of installation, and accuracy.
Is an expensive rip fence worth it?
For hobbyists, maybe.
For professionals, almost certainly.
The improved accuracy, reduced waste, and increased efficiency often justify the investment.
Final Thoughts
If there’s one lesson I learned from talking with professional trade colleagues, it’s this:
Your table saw is only as accurate as its fence.
The blade gets the attention.
The motor gets the praise.
But the Table Saw Rip Fence quietly determines whether your cuts are perfectly straight or frustratingly inconsistent.
For most woodworkers, the Delta 36-T30 T3 Fence System offers the best balance of performance and value.
For professionals who demand maximum precision, the Biesemeyer Commercial Fence remains the gold standard.
Whichever model you choose, upgrading to a quality Table Saw Rip Fence is one of the smartest investments you can make in your workshop.
Because dead-straight cuts don’t happen by accident.
They start with your fence.
Just as a reliable rip fence improves cutting accuracy, a dependable canvas work jacket becomes an essential part of your everyday work gear.
If you like practical, no-nonsense guides that help you build better, work safer, and get more done in the garage without wasting your weekend, Alpha Dad Mode is worth a look. It’s built for dads who want useful skills, better gear decisions, and real-world advice they can use.